Section III: Job Matching
- In this section you will be matching up internal benchmarked jobs against the survey job you've recently imported.
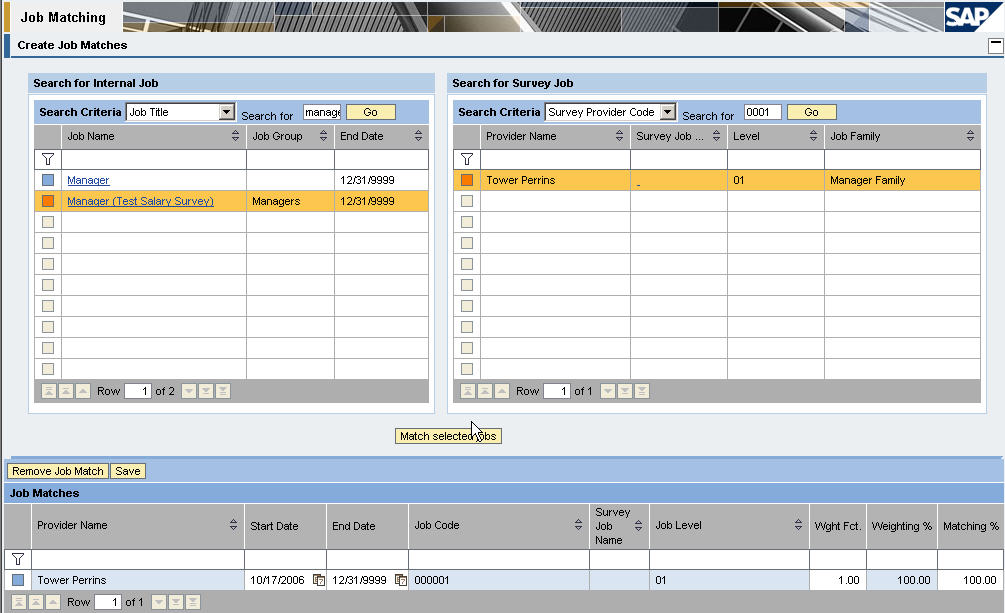
On the left column, you will need to select the SAP JOB to match up against the JOB you've uploaded previously from the provider. Once you selected them, click on the "Match Selected Job" button. At the bottom, you will do the weighting factor and matching factor. This determine of what % the job survey data will be used to weight against your internal job to be used for aging later.
For example, you have a software engineer job and you received data from two separated provider. One from Tower Perrins and one from Mercer both containing benchmark data for Software Engineer. In this step, you could specify the weighting factor from Tower Perrins only be 40% and the Mercer matchup is 60%. When you do the composite result in later step, it will take that into account.
Section IV: Aging
- At this step, you will age the market data imported earlier

Section V: Composite Result By Internal Job
- You are creating a result report against internal jobs and compare it against your employee salary or the salary structure they hold.
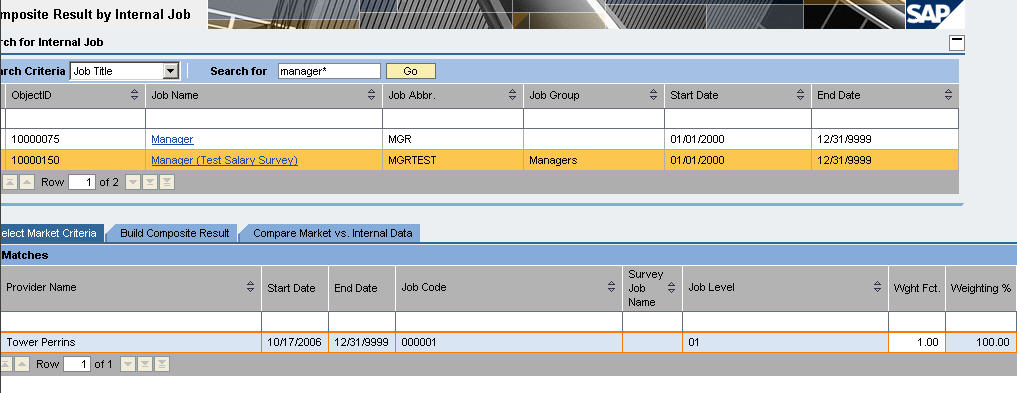
You first search for and select the job you will be creating the composite result against. Once selected, the bottom half will show you the match up you did earlier, in our example we had Tower Perrins be 100% weighting factor to this Manager job. At this stage you could still make adjustment to the weighting factor you did earlier, if needed.
Base upon that, now move to the "Build Composite Result" tab

On this tab, the top portion shows the imported market data. Click on the "Build Composition", will take the aging, weighting factor, current value of the internal job and build a new composite result.
To see more columns click on the "Show All Columns" on the top portion will show up all of the columns you imported in the import step show in section II-C in Part I of this guide. If you click on "Show All Columns" in the bottom portion, you will see additional information on the internal job, such as job object ID, pay category, etc.,
Upon saving the information, it will write back to SAP R/3 to infotype 1271 on the job object. See below.

As you can see the value from two screenshots above (Portal view & SAP R/3 view), the value has been written to SAP.
Section VI: Create Mass Composite Result
- Similar to section V, this allow you to do to is at a mass volumn at once.
Section VII: Salary Structure Adjustment
- Compare the internal salary structure to the market salary structure and have it updated. If you recall, earlier when you uploaded the market data, it as for the salary min, max, and midpoint value.
You could read more on the help file (HERE).
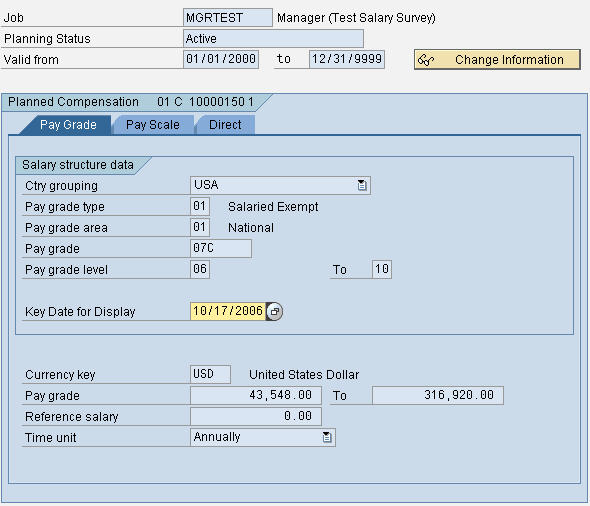
In our test job Manager we've created earlier, we have a plan compensation (infotype 1005) as followed.
With that, on the portal side when using the Salary Structure Adjustment, you will see as such
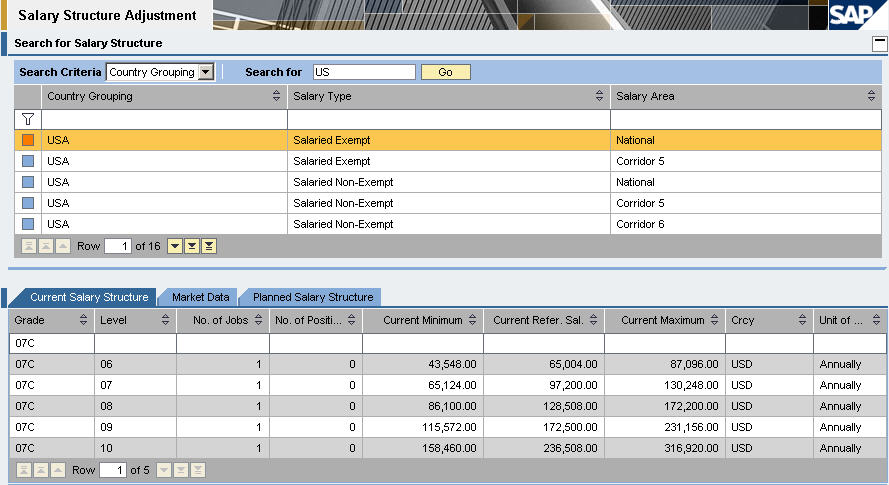
If you recall earlier, in our market data we've uploaded, there was a min, max, mid value used to upload. We've gone through the step of matching it to the internal job, determine the weighting factor, and just finished with creating the composite benchmark result for it.
With that, when you move to the Market Data table and search for the "grade", you will notice SAP has handled the calculation for you.
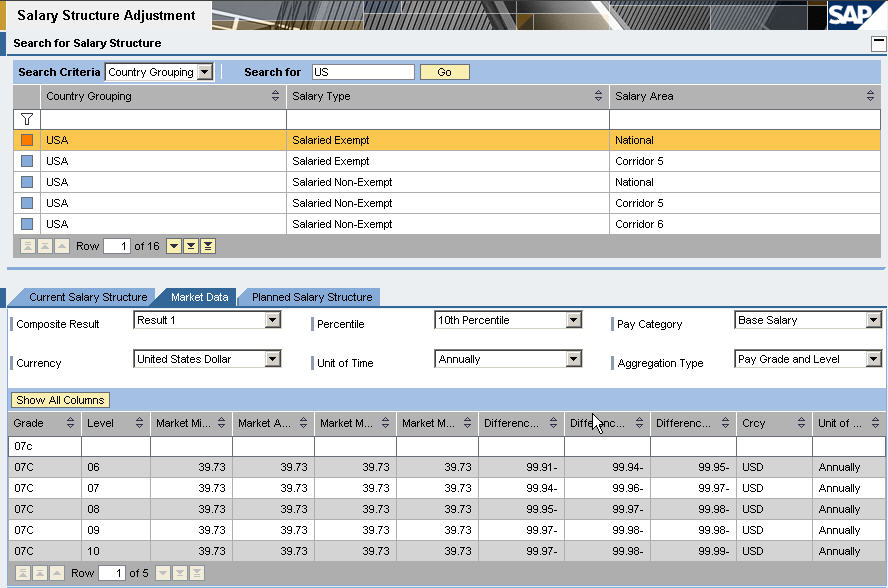 (Note: The numbers from screenshot above will be extremely off due to the low balling of the grade value in our test import data. )
In the last tab "Planned Salary Structure", it will use the information aged, weighted, and matched to create a new salary structure for you.
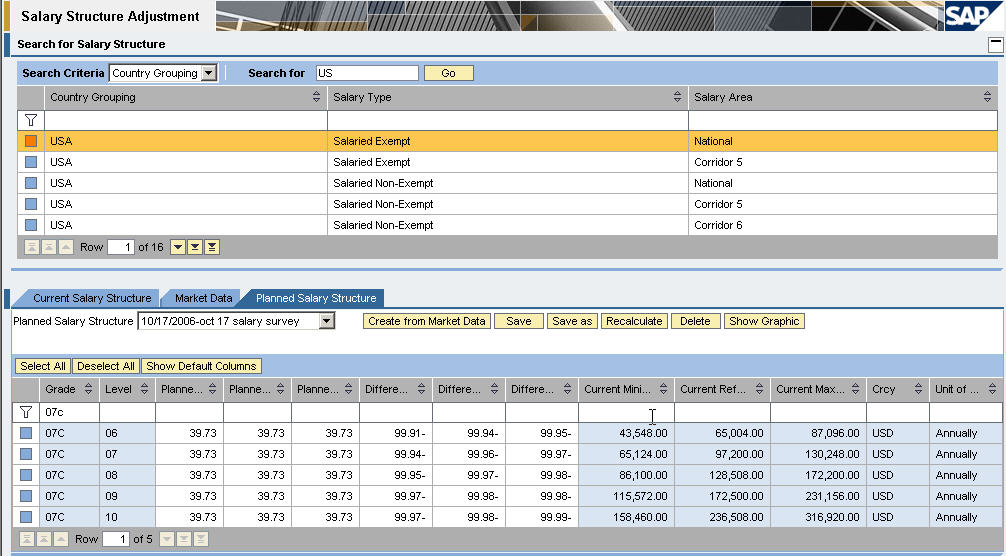
Once you click on save, it will save the information in "Planned Status". Once you've obtained the management approval for your research and market pricing, you will need to execute the program "Update of Pay Grade Amounts from Market Data" to activate the new structure.
In the SPRO IMG, follow the path to the location of the program
SPRO -> Personnel Management -> Enterprise Compensation Management -> Job Pricing -> Pay Grades and Levels -> Update Pay Grade Amounts From Market Data
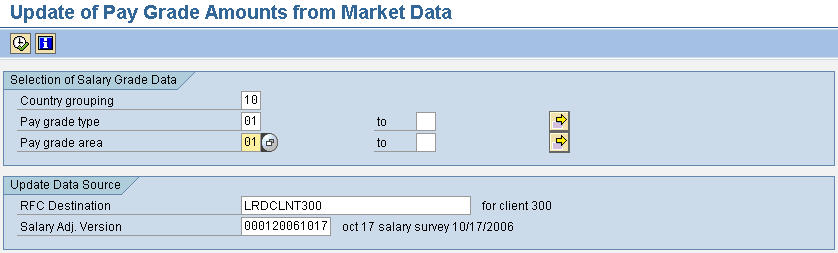
(Important Note: When you are performing all of this functionality, you are doing it in the production environment, as the result the update will not be done to the production environment. Ensure you have a proper RFC connection back to your development client / gold client where you handle the configuration from. With that, the update pay structure will write back to the gold client. )
Upon executing the program, it will provide you with a report prior to handle the actual update.
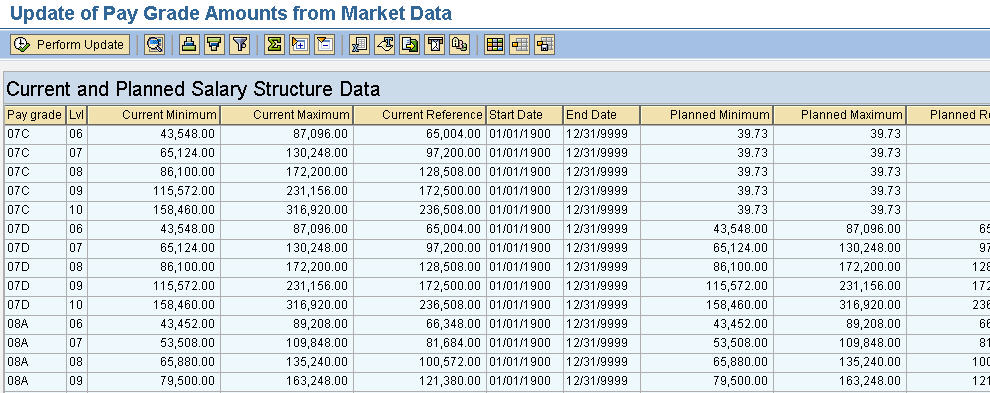
As you can see, it will show you the current value in the pay structure and the "TO BE" pay structure if the perform update is executed.
As a recommendation, it is better to execute up to this part only and save this information as a Microsoft Excel file. Do your finalizing offline and submit the excel sheet to the department handling configuration in your company. This would be the safer method and less heachache to deal with in terms of security in the production environment.
This conclude my two parts high level overview guide on SAP Job Pricing and Market Survey functionality. Feel free to comment on them and provide feed back on your experiences of it.
Cheers!
KN
1 comment:
Hi Kevin
Could you please provide us those
data .. the link does exist any more
http://www.saphelpbykevin.com/sap/samplefiles/jobpricing_upload1.txt
http://www.saphelpbykevin.com/sap/samplefiles/jobpricing_upload2.txt
http://www.saphelpbykevin.com/sap/samplefiles/jobpricing_upload3.txt
Many thanks
Sbel
Post a Comment